Refracted.net
  • Home
  • Reflected
  • Gallery 1
  • Gallery 2
  • Techniques
    • Nikon D70 Macro
    • Rodenstock Imagon
    • Budget Fisheye
    • Slit Scanning
  • PhotoHistory
    • Lectures
    • Mizuno
    • 35TLR
  • Restoration
    • Fotochrome
    • Gami-16
    • Graphic 35
    • Karma-Flex
    • Kirk Stereo
    • Komaflex-S
    • Leatherwork
    • Lens Caps
    • Megoflex
    • Panorascope
    • Pressmaster
    • QRS Kamra
    • Walz Automat
    • Watkins Darkroom Clock
  • Harmonograph
  • Fractals
  • Contact

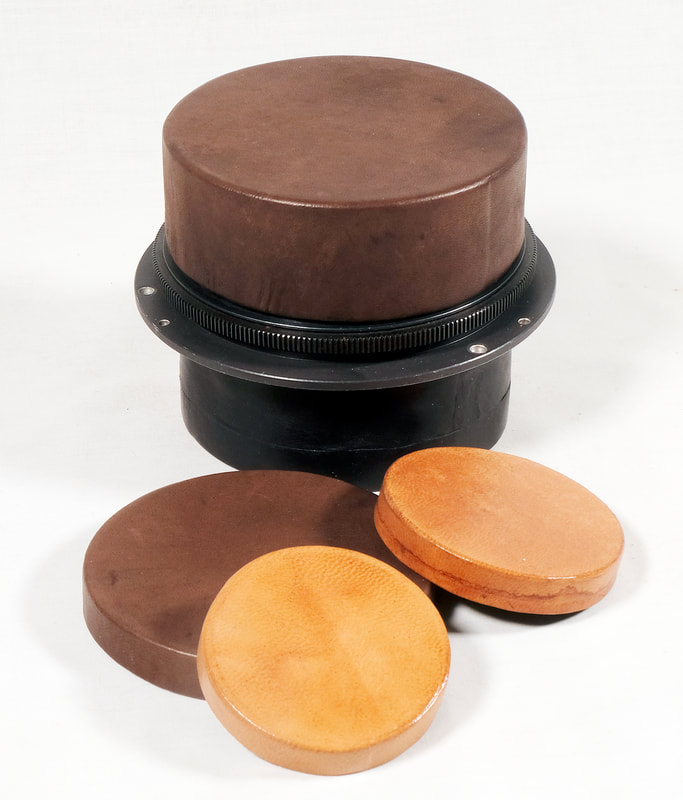
Making Leather Lens caps

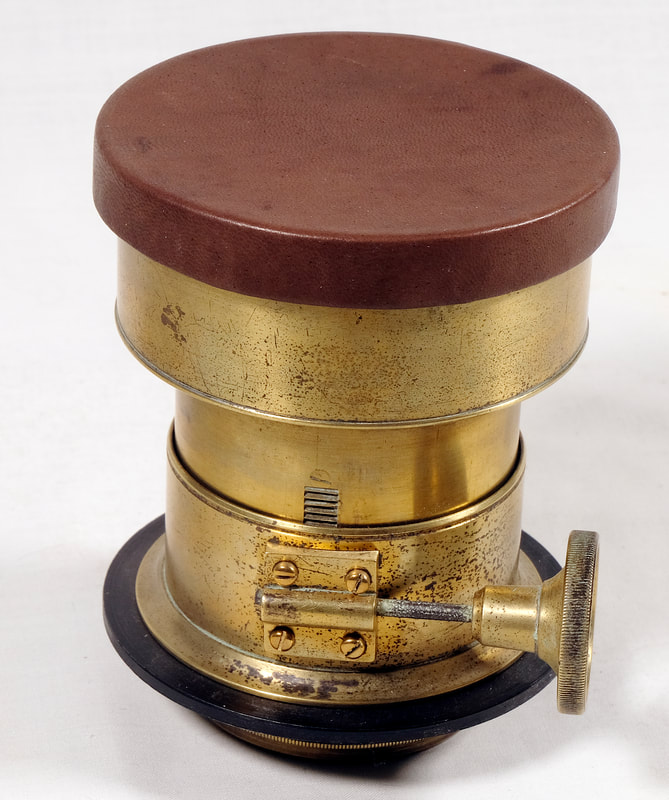
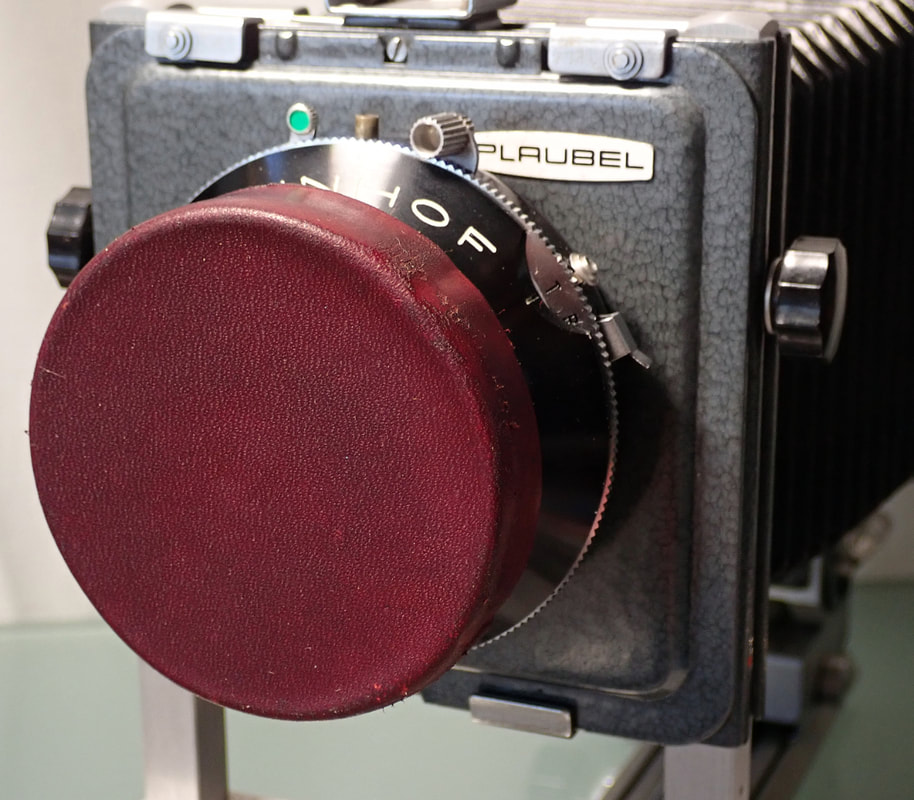
I know I’m not alone in having numerous old lenses whose caps are lost, which should be nice leather items not moulded plastic. So how to use up oddments of material to make some?
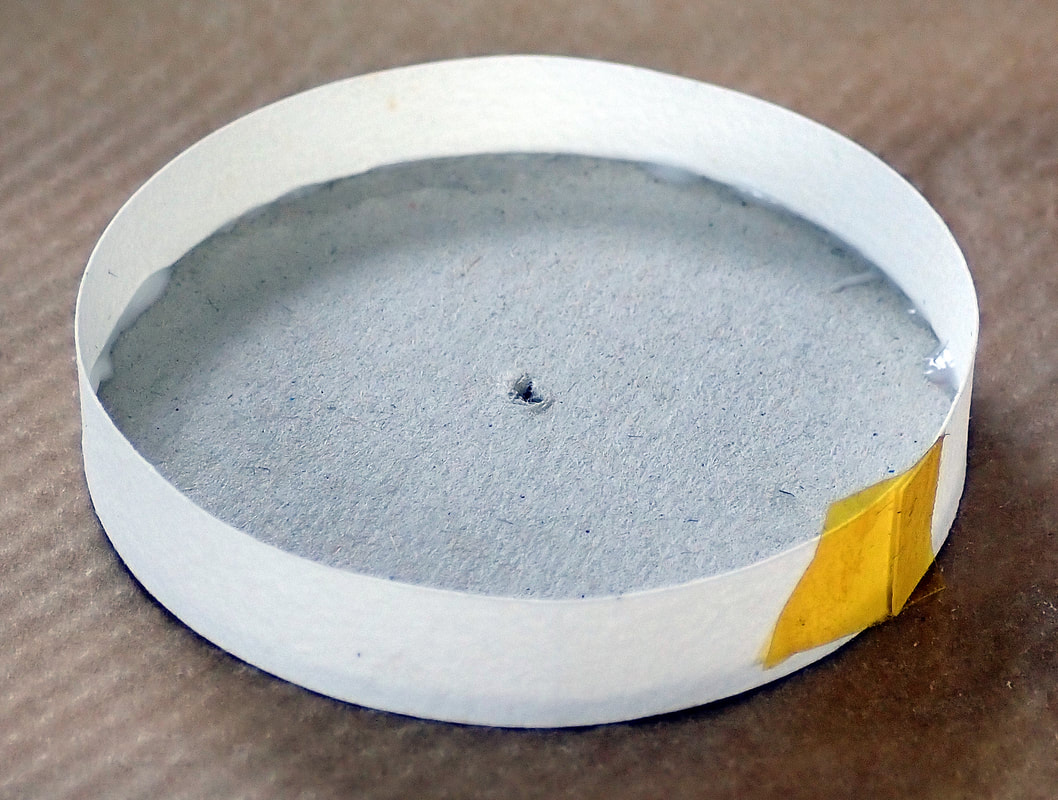
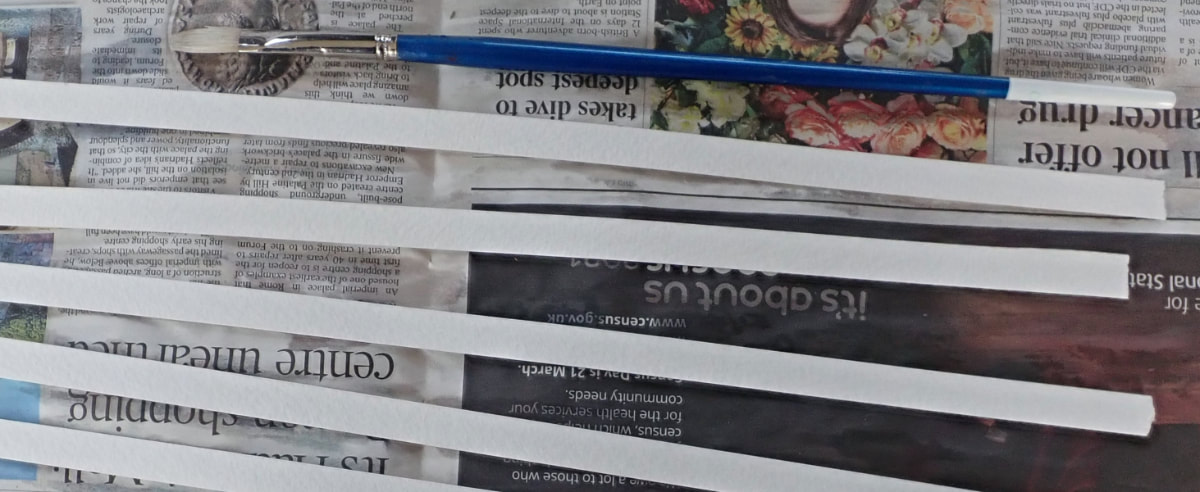
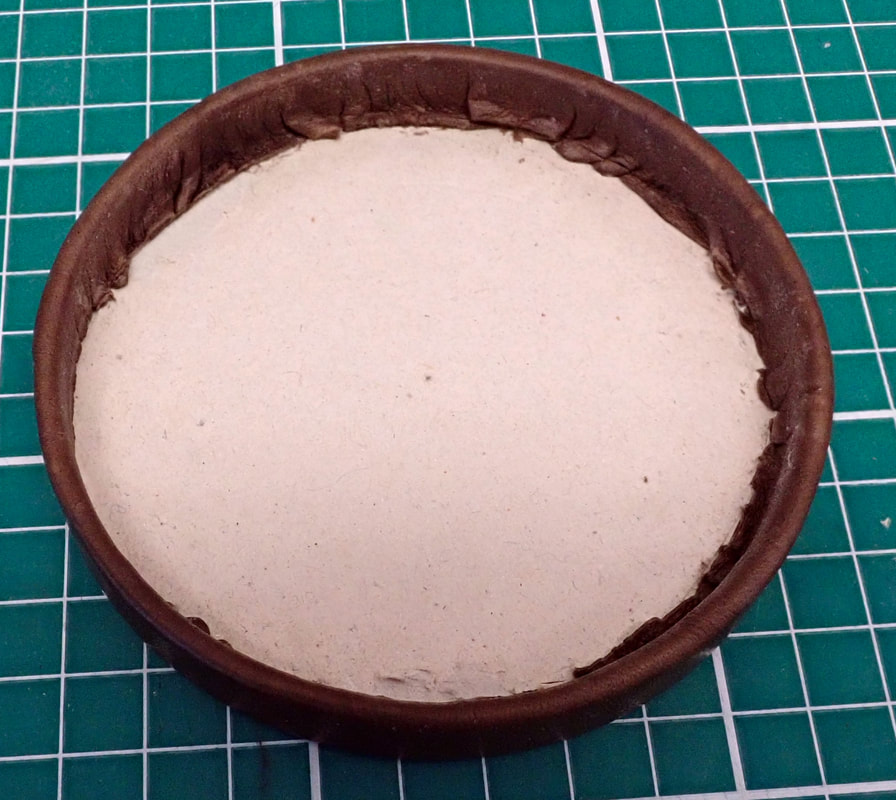
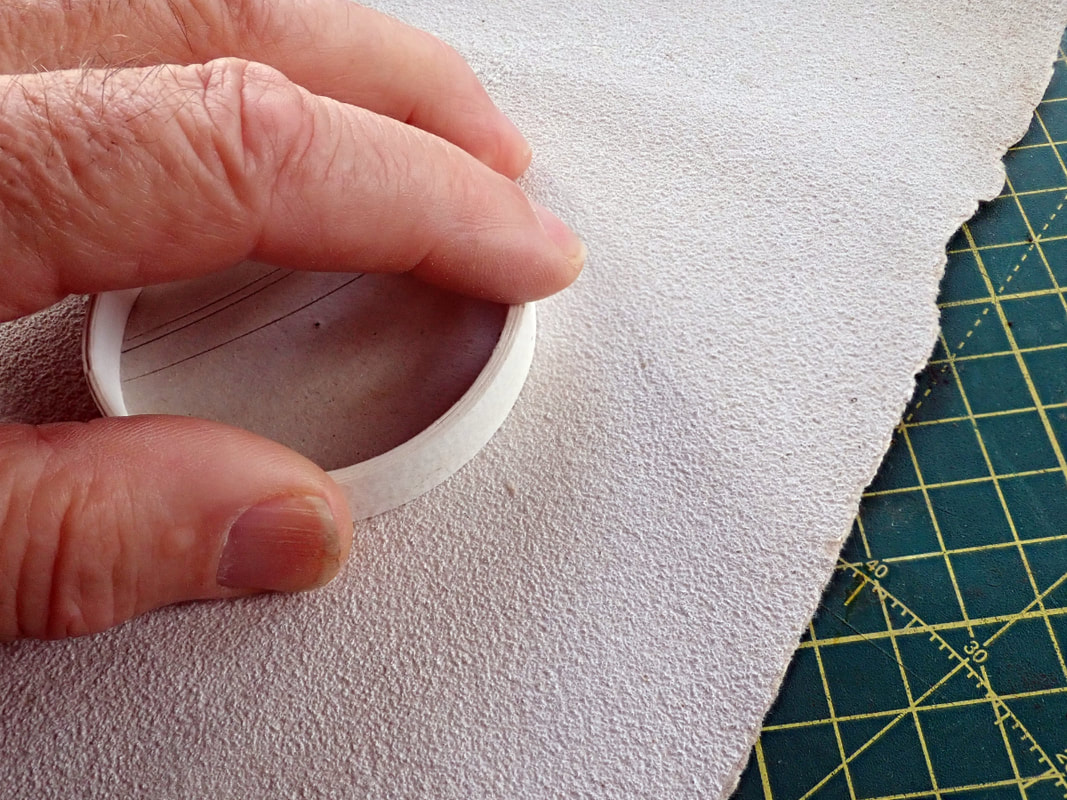
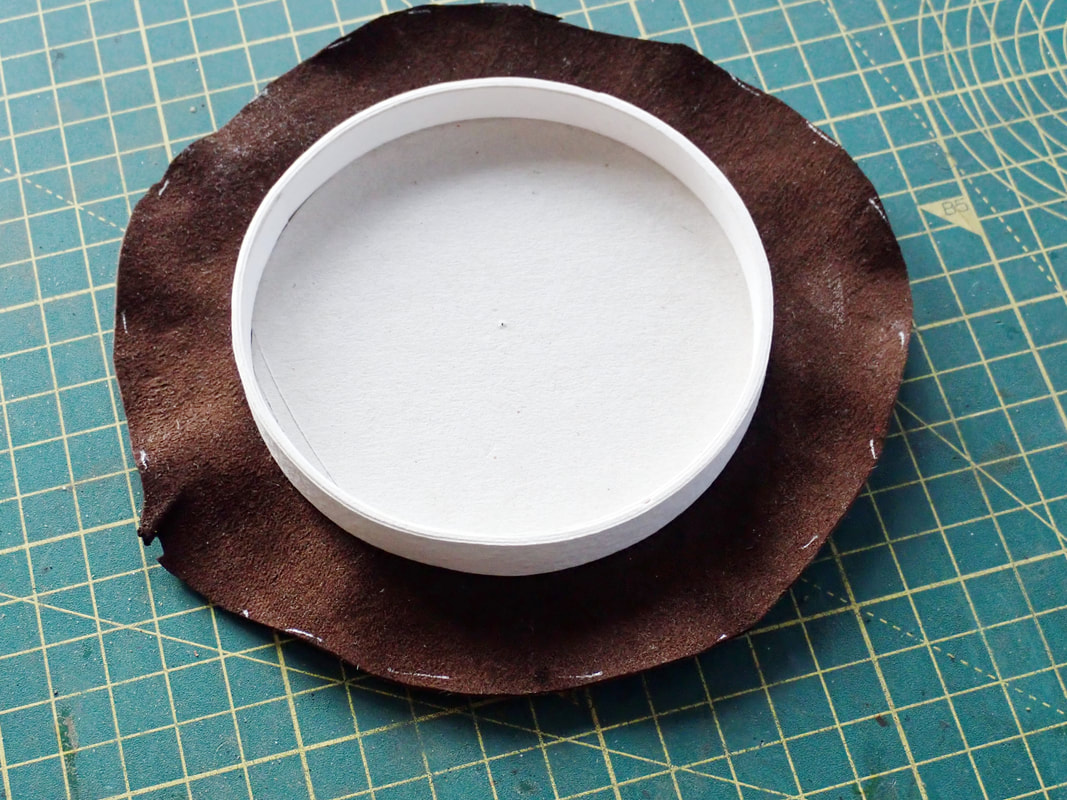
This method depends on the fact that thin soft leather, when wet, becomes very elastic and can be stretched over a hard surface where it will dry in its new shape. So it won’t work with any of the leather alternatives – leathercloth, Rexine and so on.
Materials needed:
  • Thin soft leather, vegetable tanned and 0.5mm thick or less.
  • 2mm thick greyboard.
  • Watercolour paper - ideally two thicknesses, moderate and very thick.
  • Self-adhesive thin felt for lining the interior.
  • Paste – a 50:50 mix of starch paste and PVA is ideal. Available from https://ratchford.co.uk/ or make it yourself.
  • Silicone non-stick baking paper
  • PVC electrical tape
  • Sandpaper
  • Elastic band
Tools:
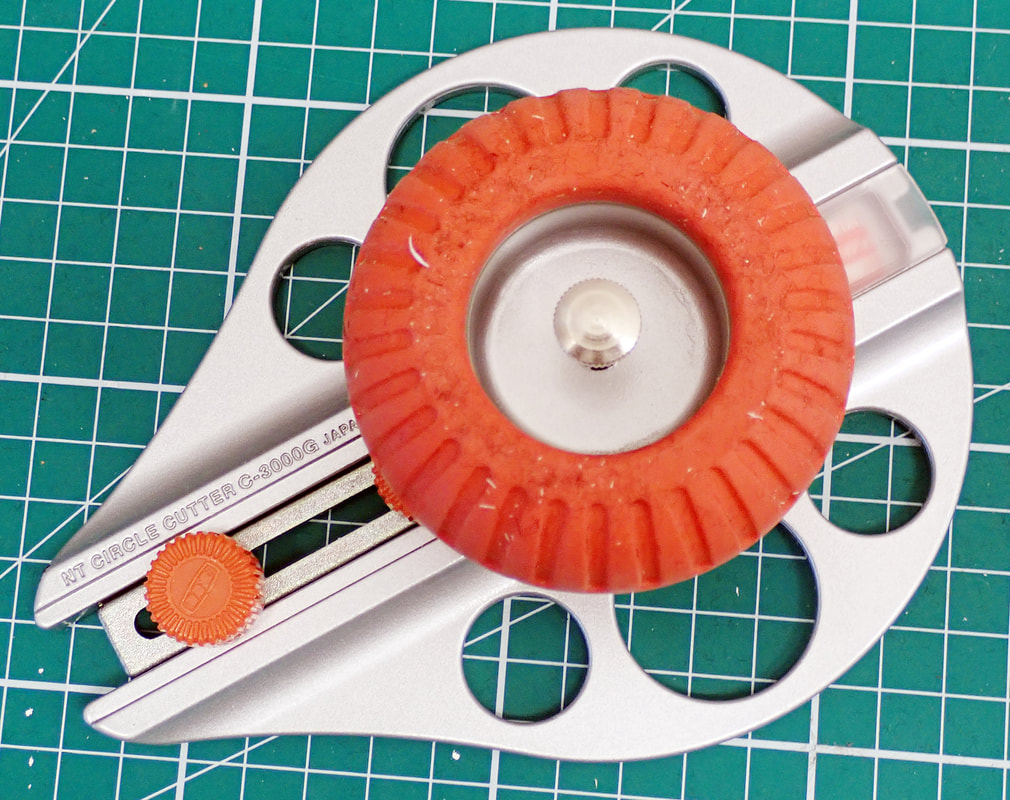
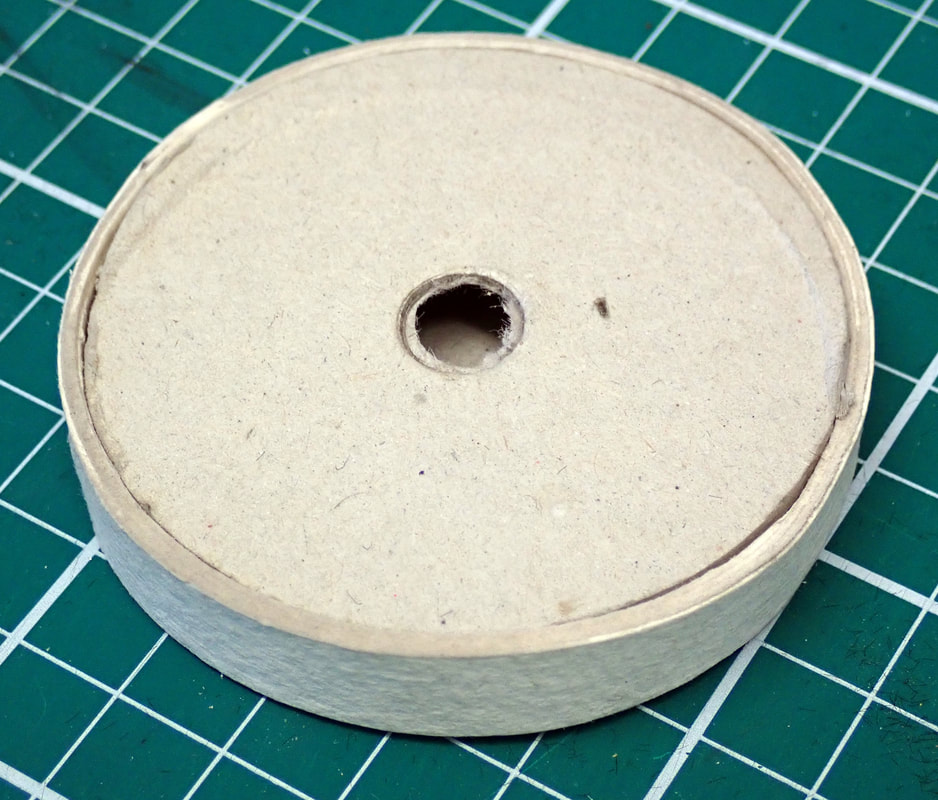
Apart from normal household items like scissors and brushes, the only more specialist thing you need is a good heavy-duty compass cutter. It needs to be able to cut the greyboard without flinching. Mine is the NT Cutter at https://www.amazon.co.uk/dp/B004INPJPQ/ref=pe_3187911_185740111_TE_item?pldnSite=1
An Olfa rotary cutter and cutting mat aren’t essential but do make life easier.
Method:
  1. Measure the outside diameter of the front of the lens, where the cap will push-fit over. This is Size A.
  2. Decide on Size B, sufficiently larger than A to accommodate the leather folded inwards over the rim of the cap. This is tricky, as it depends on both the original thickness of the leather and its reaction to wetting and stretching. I suggest diameter B=A + 2mm as a starting point, but you may have to do a trial and adjust. If you are very short of material for trials, note that a slightly oversized cap can have extra material glued inside, but one that’s too tight is not easy to fix.
  3. From the greyboard, cut out one disc Size A, two of Size B.
  4. Decide how deep the rim should be; typically about 10mm, but depends on the dimensions of the lens. The rim will be formed from strips of watercolour paper, this depth + 2mm.
  5. Cut a strip of the thinner watercolour paper long enough to encircle the Size B disc with a few centimetres overlap.
  6. Apply paste to the edge of one Size-B disc, place it on a piece of non-stick paper, and wrap the paper strip around under slight tension to form a very thin version of the rim. Hold the overlap with a small spring clip, paperclip, or tape. Press both the disc and the paper circle down onto the baking paper, so you have the basic form of the lenscap. Leave to dry.
  7. Using the heavy watercolour paper, cut several strips the same width as before.
  8. Lay these strips on newspaper, paint them both sides with plain water. This will soak in and make the paper soft and flexible, but not saturated. Wait 10 minutes.
  9. Apply paste to one side of the first strip, and wrap it snugly under slight tension round the outside of the rim of the lens cap. The strip should not be exactly the right length to go round – it should be either shorter or longer by a centimetre or more. This is to ensure that as you build up layers the joints don’t coincide.
  10. Paste another strip, butt up the end to the one just applied, and wrap it round again. Continue doing this until you have built up a thickness of around 2-3mm. With the material I used, this needs 2-3 strips.
  11. Persuade the other Size B disc into the upper inside of the rim of the lens cap, to support it and make sure it dries in a nice even circle. It is not meant to stick there.
  12. Put an elastic band round the damp pasted rim to hold everything in place. Leave to dry well – overnight is good.
  13. Now remove the band and ease out the loose disc, which has now done its job and may be discarded if you don’t want to make any more the same size. The lens cap at this point should be hard and strong, but a little oversize for the lens.
  14. Using a coarse abrasive paper about 60 grit held flat, face up on the table, rub down both edges of the rim to make them smooth and even.
  15. Mark a rough circle on your leather. It needs to include enough material to go up the side of the rim, and then over and down inside, all the way round. So that’s a diameter of approximately Size B plus 4x the width of the paper strips. Cut it out with scissors; or a rotary cutter, freehand, does a neat and quick job.
  16. Soak the leather disc in plain cold water. Leather varies a lot depending on how it has been prepared. If the water wets it instantly and soaks in like blotting paper, then leave it 30-60 minutes before the next step. However, maybe the water will seem to be rejected and run off. In that case a much longer soak is required. I mix water and methylated spirit roughly 2:1 and soak overnight. Note that with pale leather, the dye in methylated spirit could cause staining, so use industrial methylated spirit or isopropanol instead.
  17. Once the leather is soaked, take it out and mop off any surface water. It should be a lot more stretchy than it was.
  18. Lay the leather face down on some old newspaper. Brush paste onto the outer face of the lens cap and lay it centrally on the damp leather. Brush more paste, on the outer and inner faces of the rim, but not going into the inside of the disc. Put a loose disc of non-stick paper inside the lens cap.
  19. Now the leather must be stretched up all round and then over the free edge of the rim. This is a manual manipulation, mainly pinching the leather over the rim with thumbs and fingers. Initially there will be lots of creases, but over a few minutes you will find that you can work them out, always pushing the excess leather into the inside. The paste at this point is lubricating the movement of the leather over the paper/board structure, but later as everything dries out will hold it there. After a few minutes you will have smooth leather all the way up the sides of the rim outside, part of the way down the inside of the rim, and then probably a crinkly mess.
  20. Wrap one layer of PVC tape around the edge of the Size A disc, under tension so that the majority of the tape pulls inwards and makes a frill either side.  Now push it, level, into the lens cap, where it will “iron” the leather down to the inner face of the rim. Push it down as far as possible, then leave everything to dry – once again, 24 hours or maybe more.
  21. The external appearance of the leather should now be excellent, smooth and tight over the whole outer face and rim of the lens cap. Pull out and discard the Size A disc and examine the leather inside at the bottom, where it will probably be messy. Use a very sharp knife (or an 18mm rotary cutter is ideal) to cut a circle through the leather at a suitable even height below the rim, and carefully tease out the untidy excess leather. The loose disc of baking paper should have stopped it sticking to the inner base.
  22. Inside there should now be leather over the rim and most of the way down the inner wall, cut off at the same height all the way round. The lower part of the inner rim, and the whole of the inner face of the main disc, are still bare paper/card. Now it’s possible to check the fit of the cap on the original lens. Does it push on with acceptable force, and hold in place without falling off?
  23. Now it’s time for the final lining with thin self-adhesive felt. Cut a disc to fit using the compass cutter (This is why we use self-adhesive felt; plain felt is too weak for the compass cutter, the backing paper of adhesive felt keeps it stiff enough to cut a neat circle.) You may well also need a narrow strip of the same felt to cover the remaining exposed paper, and possibly further up the inside face if the cap was too loose on the lens.
  24. If you wish to apply wax or lacquer, make sure everything is really dry, and now’s the time to complete the finishing.
There! I didn’t think it would come to 24 steps. Once you have done a couple, it is an easy job taking little time, fitted in between other activities, so despite the long instructions it is really not time-consuming apart from several occasions of waiting for things to dry. The resulting lens caps look really good,  should last a century, and cost very little money.
Picture
Picture
Picture
Picture
Picture
Picture
Picture
Picture
Picture
Picture
Picture
Picture
Another Method
Picture
Picture
Picture
Picture
Picture
Picture
Picture
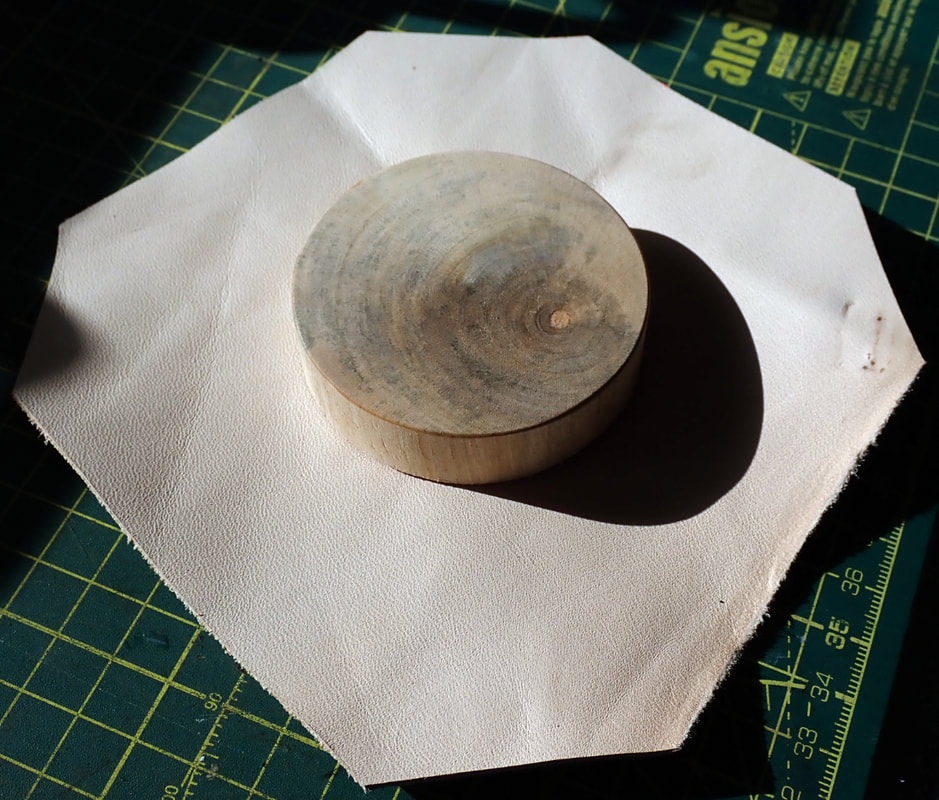
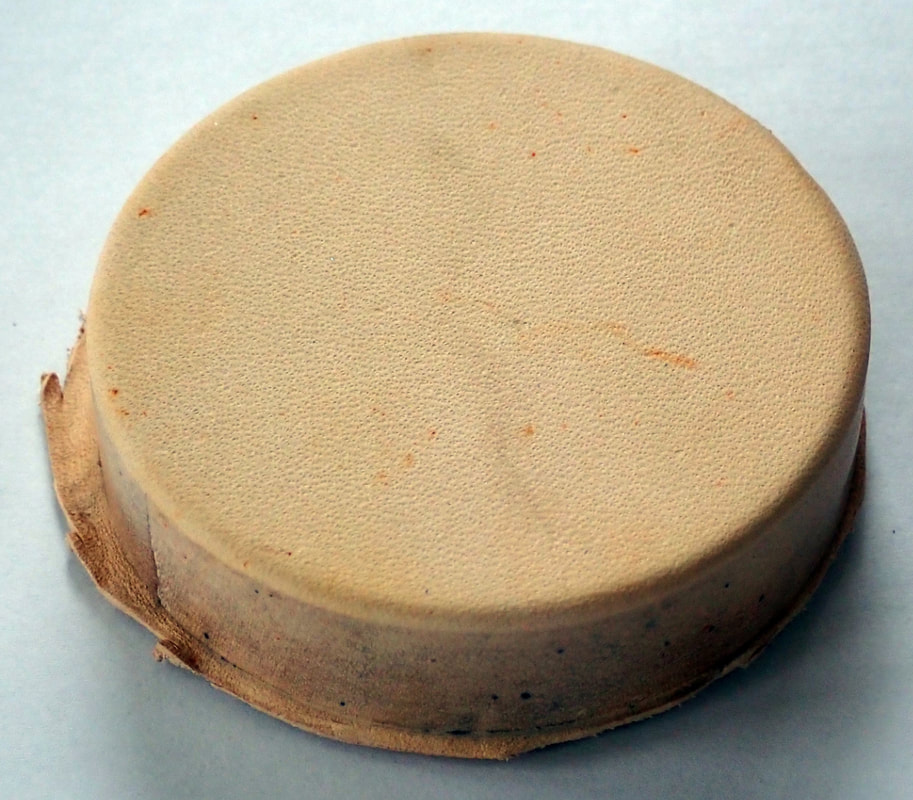
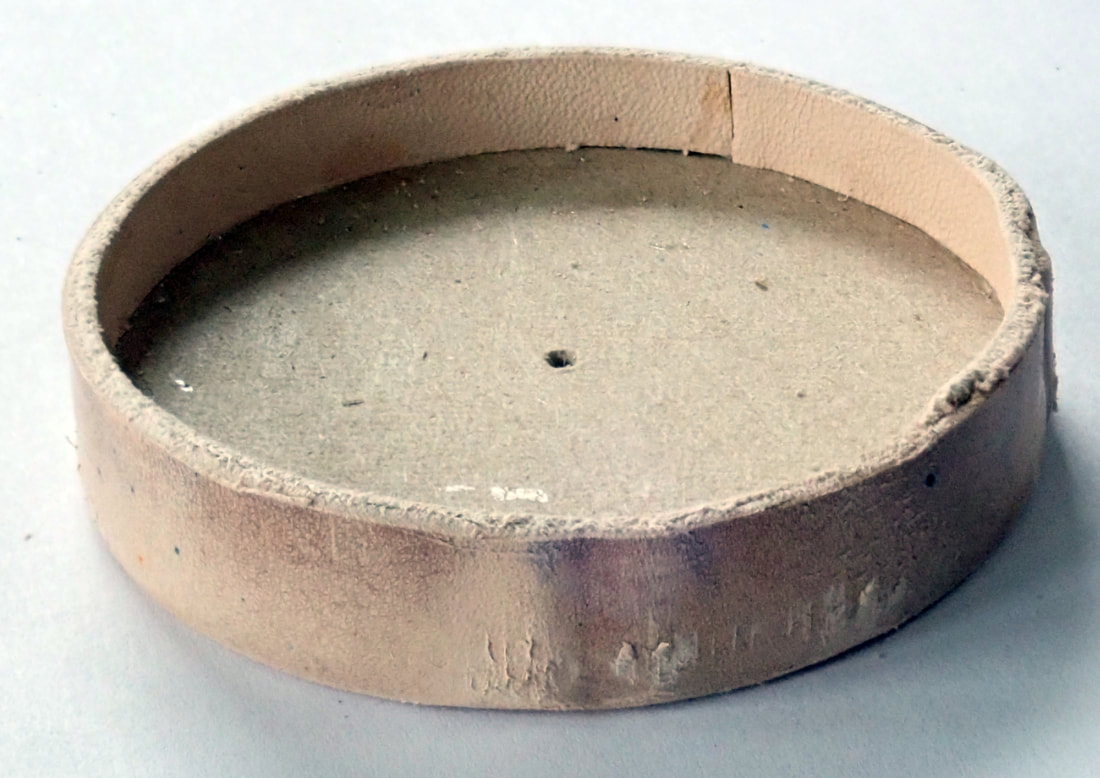
​Although the above method is my preferred one, I have found another which requires neither the very thinnest leather nor building up a paper armature. The appearance is good, though some small marks are likely on the rim.
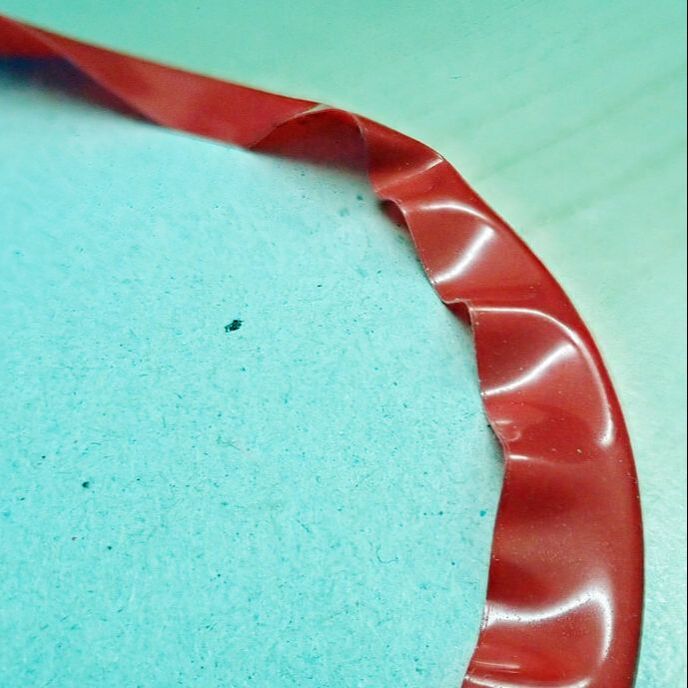
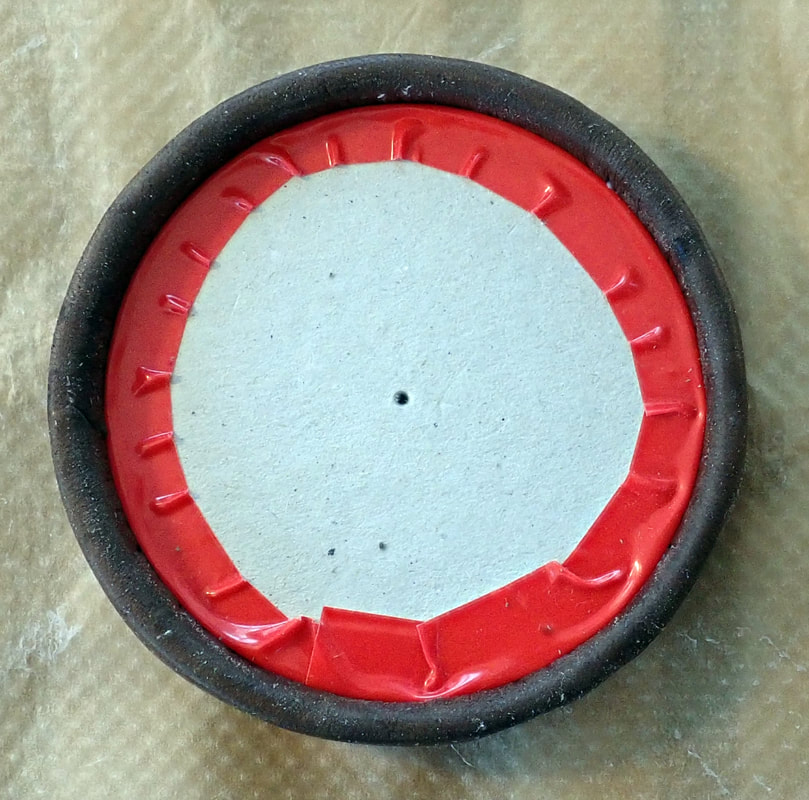
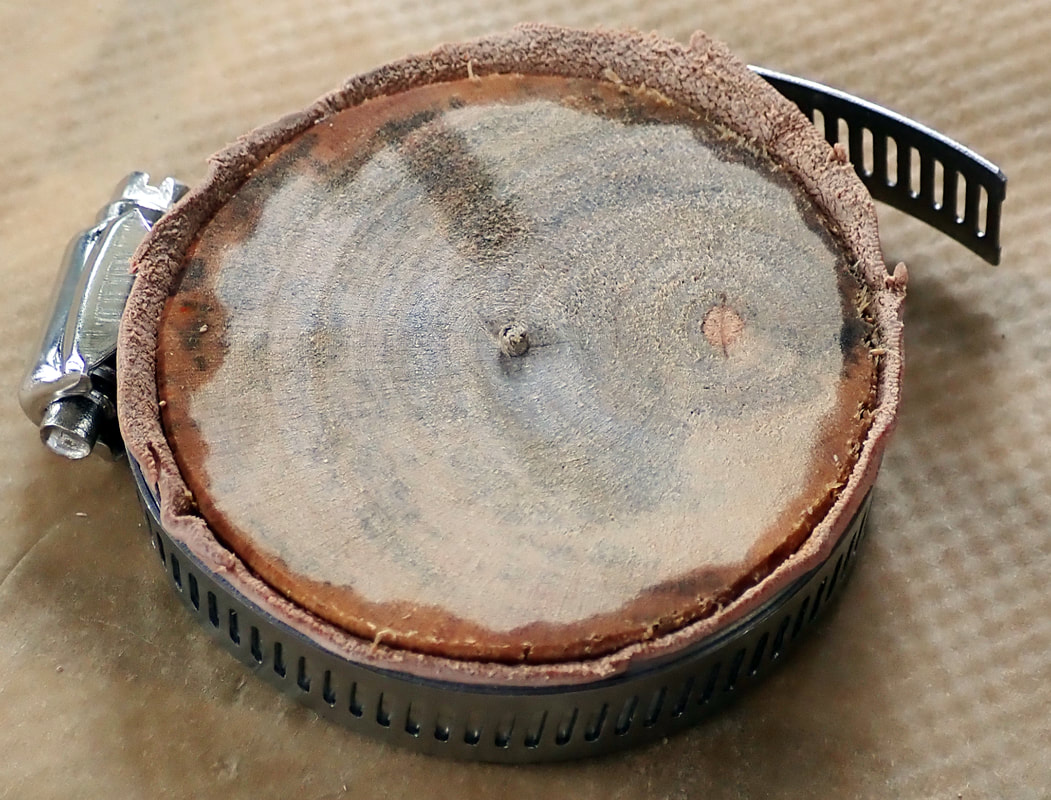
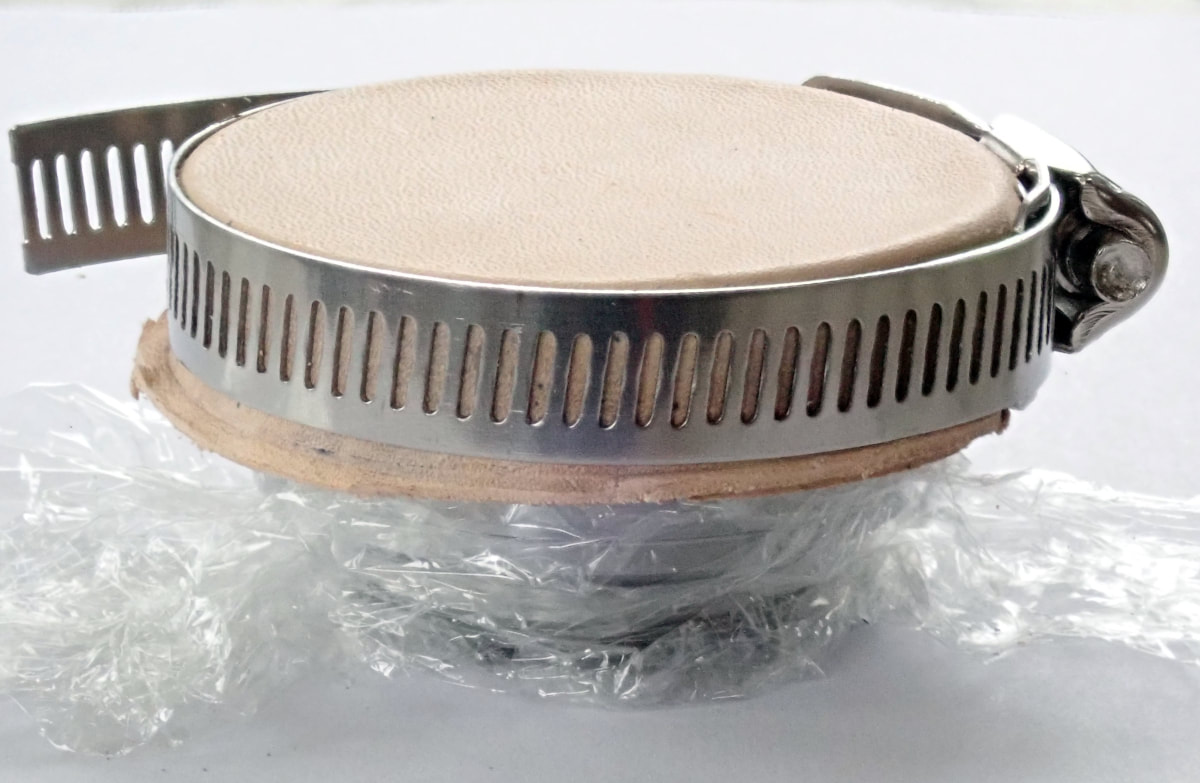
The idea is to wet-form vegetable tanned leather as before, but to use cow leather around 1-1.5mm thick, which is much easier to find than the very thin material used for the first method. The forming is done with a hose clip (Jubilee Clip or equivalent) and an inner mould. If you have a lathe (wood or metal) this method is particularly viable, as you can easily turn a piece of scrap material to the required size.
Materials needed
  • Vegetable tanned cow leather 1-1.5mm thick
  • 2mm thick greyboard
  • Self-adhesive thin felt for the interior lining
Tools
A pipe band clip of suitable size. The depth should match the depth of the rim of the cap, 12mm is a standard size and normally suitable. The maximum diameter should be several millimetres (10mm or so is ideal) more than the final diameter of the cap. It can either be a fixed size, or a kit consisting of band that is cut to size, and buckles to fit.
A strip of thin hard shim – I use 0.2mm thick stainless steel. Cut a strip of this the same width as the pipe clip, long enough to go round the circumference of the cap plus an overlap of a few centimetres. Smooth the long edges, and feather both ends with a grinding wheel.
Method
  • Measure the outside diameter of the front of the lens, where the cap will fit over.
  • Find or make a short cylindrical piece of wood, plastic or metal of this diameter plus twice the thickness of the leather (Size B as above), and depth anything in excess of the size of the cap which is typically 12mm.
  • Cut out a rough circle or octagon of leather of the required cap diameter plus twice the depth of the rim, plus a centimetre or more extra – enough to get a grip and stretch the leather.
  • Soak the leather for an hour or so in cold water, take it out and pat it dry on the outside with a cloth..
  • Arrange the wet leather centrally over the former, then the shim (which helps protect the surface of the leather from dents from the buckle and band of the clip), then the clip, a little loose at this stage.
  • With everything centred and aligned, tighten the clip gently so that the leather is captured but not yet gripped.
  • Pull the edges of the leather to stretch it in each direction, keeping it centred. There will be lots of crinkles at first, but as you work around stretching, tighten the hose clip in small steps, pulling at each crease until the frills are outside the compressed area. All this gets easier the larger the diameter of the cap.
  • Tighten the clip firmly and trim off the majority of the excess leather with a sharp knife or scissors.
  • Leave to dry thoroughly – 24 hours at least.
  • Loosen the clamp and remove it and the shim. The leather should be lens cap shaped, with no crinkles in the part that’s wanted, and some to trim off at the free edge. Slide the cap off the former. There may be a small mark left where the end of the shim touched the leather.
  • The cap should now hold its shape, but is too flexible. As in the first method, cut a greyboard disc to fit snugly inside and glue it in.  The cap will no longer be floppy, but the rim material is still too thin.
  • Cut a strip of the original leather to match the internal depth of the cap plus a millimetre or two, and trim it to length so it fits snugly inside the rim of the cap. Use the original clip on the outside, only slightly tightened to maintain the rim's shape. paste the leather strip to the inside of the rim, fair face showing. Cover the lens with cling film, fit the cap, and make sure the clip holds it snug but not tight. Leave to dry.
  • Remove from the lens, take off the clip, and trim the free edge carefully with a sharp knife.
  • Now the cap should fit the lens comfortably, and the rim is thick enough to take the stresses and strains of use.
  • Dye, lacquer and polish to taste. Fit a felt disc inside if desired. 
This method uses more readily available materials and is only slightly easier. The resulting cap looks a bit neater internally and is more likely to fit correctly first time. On the other hand, the external appearance of the rim is more likely to have markings from the stress and pressure involved in the process, that remain visible on completion. Both methods produce a good-looking outer circular face. 
Picture
Copyright © 2022 by John Marriage
  • Home
  • Reflected
  • Gallery 1
  • Gallery 2
  • Techniques
    • Nikon D70 Macro
    • Rodenstock Imagon
    • Budget Fisheye
    • Slit Scanning
  • PhotoHistory
    • Lectures
    • Mizuno
    • 35TLR
  • Restoration
    • Fotochrome
    • Gami-16
    • Graphic 35
    • Karma-Flex
    • Kirk Stereo
    • Komaflex-S
    • Leatherwork
    • Lens Caps
    • Megoflex
    • Panorascope
    • Pressmaster
    • QRS Kamra
    • Walz Automat
    • Watkins Darkroom Clock
  • Harmonograph
  • Fractals
  • Contact