Slit scanning experiments
The Seitz Roundshot 220 is a rotating-body panoramic camera for 120 or 220 film. As well as its normal panoramic mode, it has the ability to scan the outer surface of a rotating body on a turntable - often used to record the outside of a cylindrical object; anything from an ancient pot to an engineering component.
To do this, the camera is separated from the base of the unit on which it normally sits, and connected by a cable some distance away. Where the camera used to be fitted, a turntable is installed to carry the subject of the photograph.
In normal use, various parameters of the set-up are carefully measured and entered into the computer that controls the relative movement of the turntable and the film in the camera. These details include the focal length of the lens, the exact distance between the focal plane and the surface of the object, and the diameter of the object being rotated. With all this done correctly, a rotational shot of a cylindrical surface produces a true and undistorted “unwrapped” image. That is to say, if the label on a can of beans had a true circle printed on it before it was attached to the can, the unwrapped photograph will also show a true circle.
|
Here it is done the conventional way, using a bottle of canned air as the subject, rotated 400° to make sure everything was included.
|

|
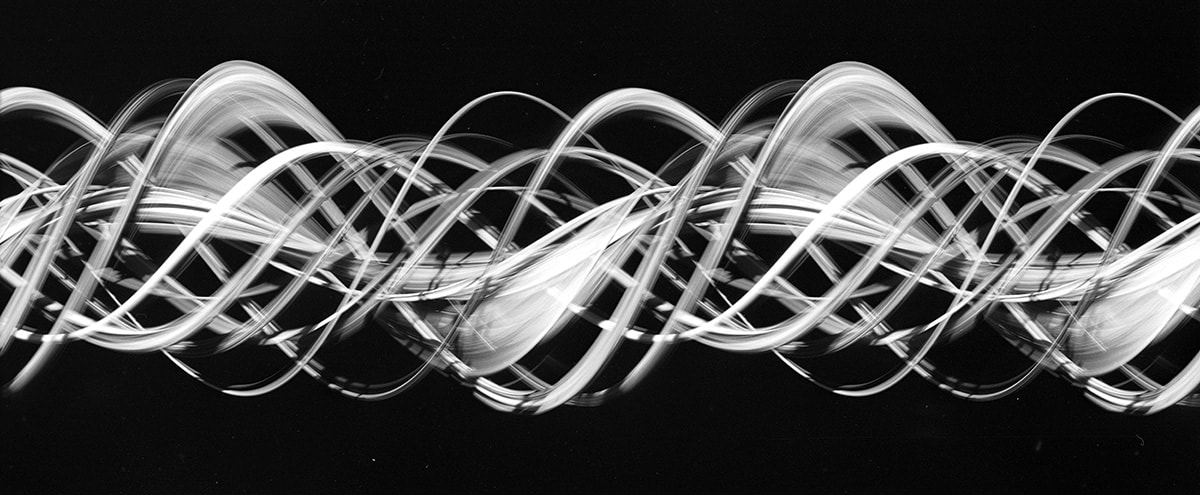
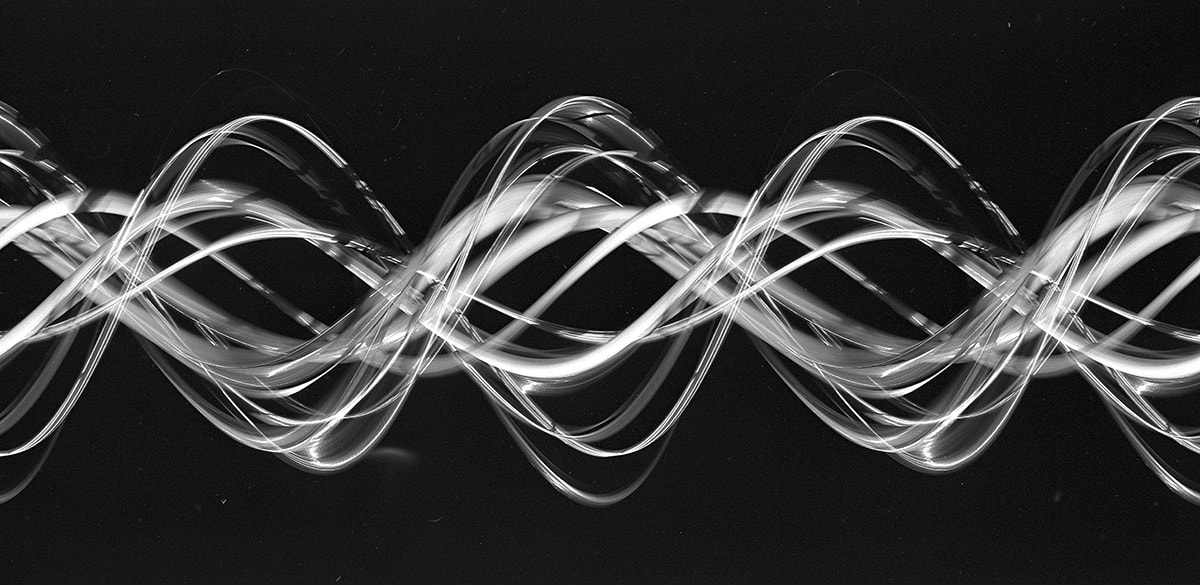
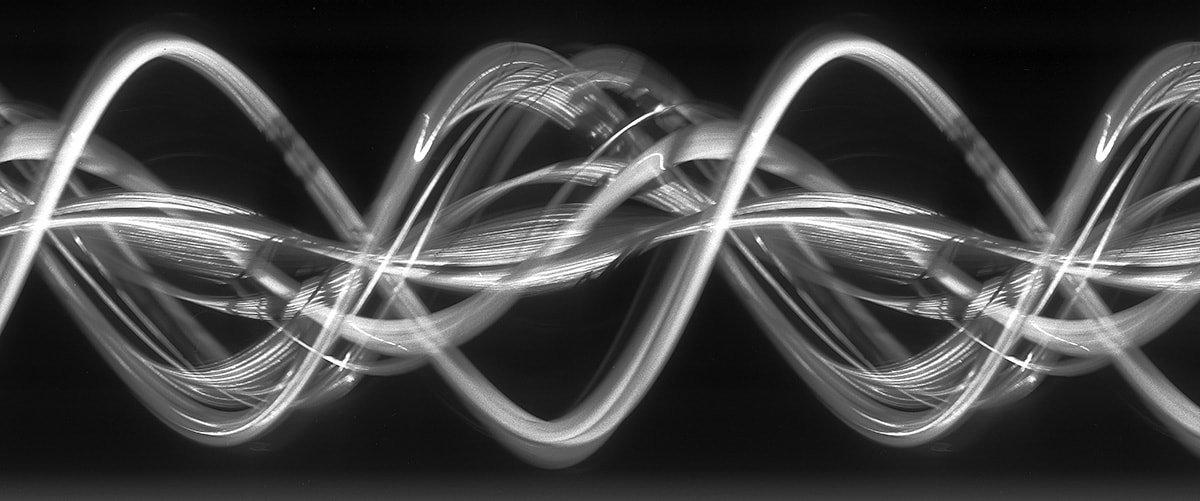
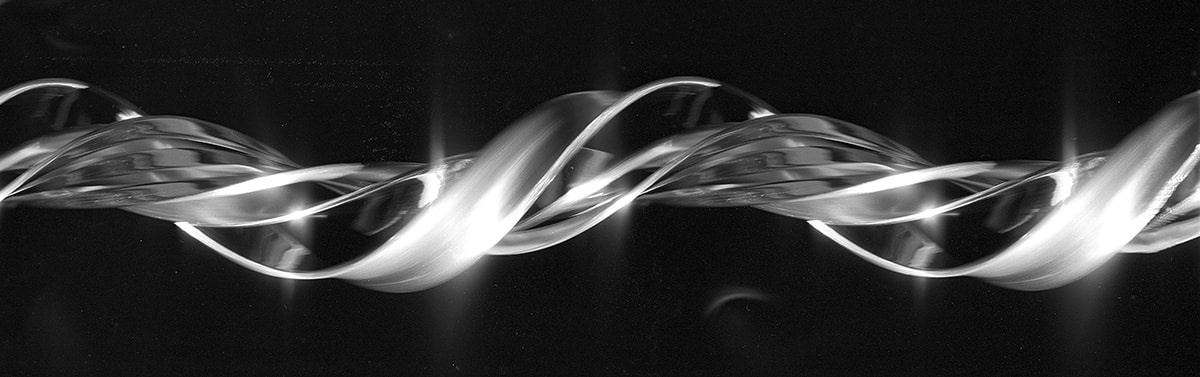
However, creative uses are also possible! With the same set up, if the camera is turned on its side, the object on the turntable still rotates normally but now the film in the camera is moving vertically, past a horizontal slit. Instead of recording two dimensions of space, the camera is in effect recording one dimension of space and one of time, as the subject rotates on the turntable. The result looks nothing like the original object. Indeed, it is clear from even a brief round of initial experiments that it is quite hard to predict the outcome. Except that, with this set up, it is likely to be some kind of complex waveform.
The physical setup is quite straightforward, not very different from taking any other sort of photograph. The turntable is fitted to the base unit (In my case I did not have the official Seitz turntable so I had to spend a few hours making one). The camera faces it at a convenient distance (say 30 cm), lying on its side on a support which allows it to be easily moved up and down so that the slit is viewing the desired part of the subject. Lighting, focus, background and exposure measurement are all conventional. To fill the eventual frame, make sure that the reflex viewer is well filled from end to end.
The physical setup is quite straightforward, not very different from taking any other sort of photograph. The turntable is fitted to the base unit (In my case I did not have the official Seitz turntable so I had to spend a few hours making one). The camera faces it at a convenient distance (say 30 cm), lying on its side on a support which allows it to be easily moved up and down so that the slit is viewing the desired part of the subject. Lighting, focus, background and exposure measurement are all conventional. To fill the eventual frame, make sure that the reflex viewer is well filled from end to end.
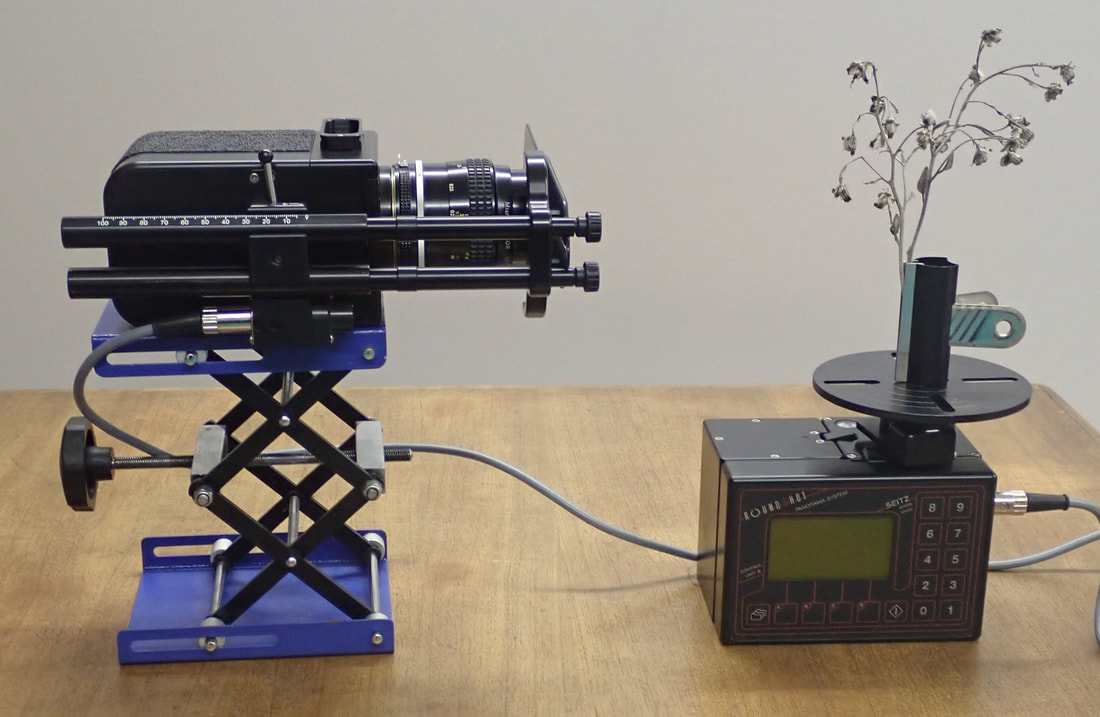
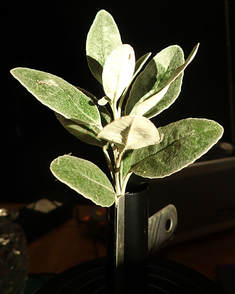
On this occasion the camera is fitted with a Nikkor 55 Micro lens, and the subject is a bunch of dried seeds from a plant in the garden. The home-made turntable is bolted to the rotating part of the control box, in place of the fitting that normally holds the camera. The item held on rails in front of the lens is like a lenshood, but with just a slit to keep out stray light. The lab-jack is the easiest way to adjust the vertical position of the camera, so the horizontal slit will view an interesting piece of the subject.
The trickier part is programming the controller. The first thing to get clear is that you do not have to tell the truth! I found the easiest way was to proceed in steps as follows:
- Set the rotation angle of the turntable; 720° or two full turns is a good starting point.
- Tell the controller the true focal length of your lens, and that the distance between camera and subject is 25 cm regardless of what it really is.
- Read from the controller’s screen the calculated magnification. For example, with a 55 mm lens and 25 cm spacing, the screen shows 1:2.017. In the formula below, you will find that M=2.017, the denominator of the ratio shown, in this example.
- Decide how much film you wish to use per shot, that is to say how wide should the final image on the film actually be? 10cm is a good starting point.
- Calculate a nominal diameter of the subject. This is a fictitious number whose purpose is to get the scale of the image correct. D=(L.M)/2π where L is the programmed distance between camera and subject (25 cm in the above example), M is the magnification ratio as above. You can see that for any particular setup, once this calculation is done, you can replace the subject with some other subject without changing anything in the controller. Using the figures in the example, you tell the controller that the subject diameter is 8 cm. The controller will then tell you that it is going to use 10 cm of film, which is just what we wanted!

This is the result using the bunch of twigs we saw above - a very different view of the scene!
|
|
And this little bunch of leaves resulted in quite a complex set of curves, all wrapped around one another.
The results are hard to predict, and hard to reproduce - a slightly different vertical position of the camera means scanning a different part of the subject. Lighting is critical too, and it is worth rotating the turntable with the camera off first, and watching from the camera position to see where potential points of light move.
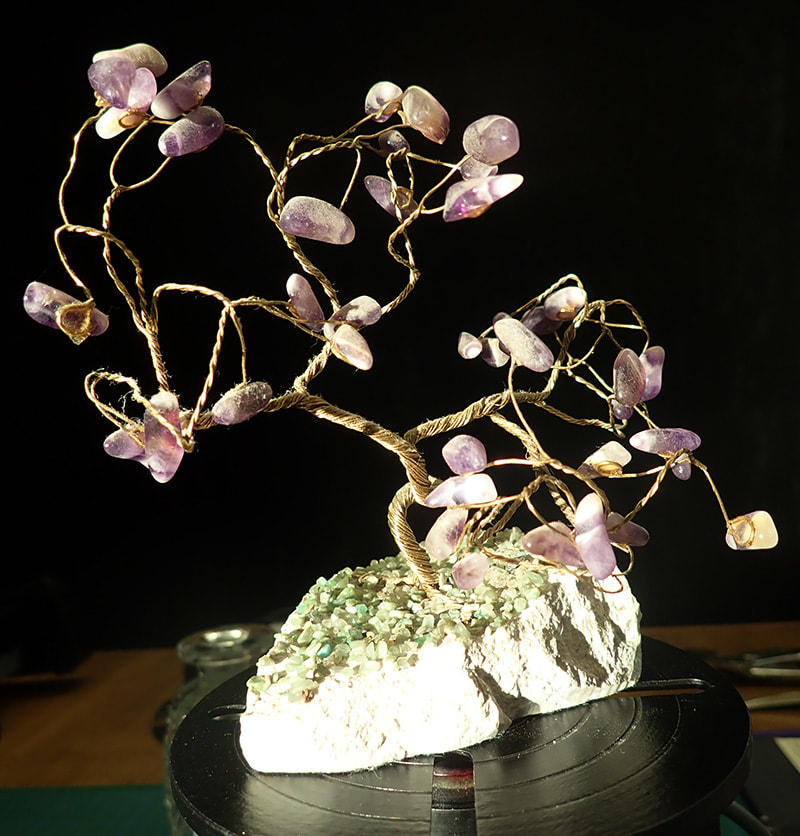
And three different images from the same ornament, just by moving the camera up and down a bit.
|
|